DIY Bobble Trinket Tray
This year, I’m making a bunch of Christmas presents to go along with the usual goodies on the list. It’s a fun and creative way to personalize gifts for those you love. I have a few friends who love their bar cart, and I always try to find something fun to add to it., whether it is a pretty bottle of booze, new champagne coupes or frilly cocktail napkins. This bobble tray DIY is one of my favorites and I’m making a few of them as gifts. One in a bright red and one in a more muted but deep burgundy. I love how this tray can be made in any color of the rainbow. It is a very simple project to make and anyone can do it, no power tools required.

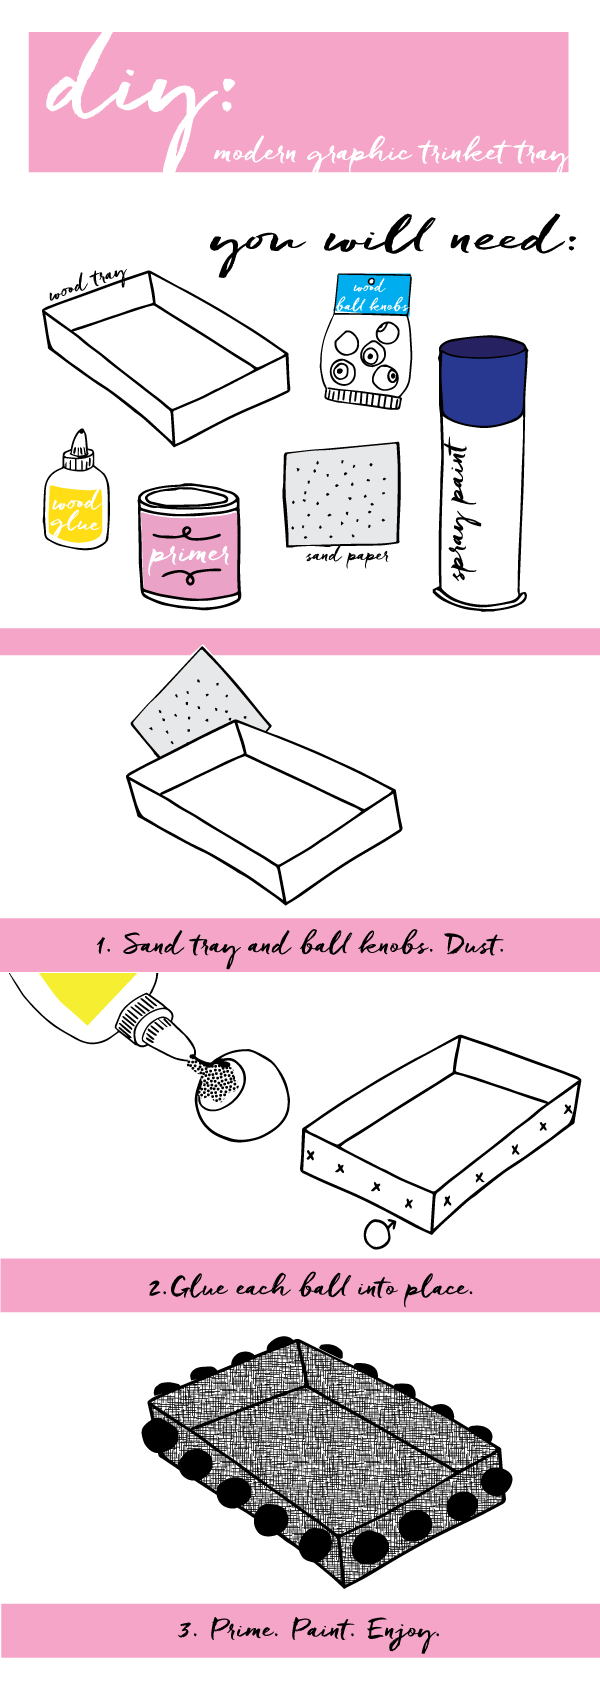
You will need:
unfinished wood tray (8"x12"), 18- 1.25" wood ball knobs, sand paper fine grit, wood glue, primer (canned or spray is fine, this is the secret sauce to getting a nice finish on the final coat), and a can of spray paint (in high gloss)
Step 1: Sand both the tray and each of the balls. Be sure to get into each of the corners and the inside sides of the tray. Wipe with a dust cloth to remove all the dust residue.
Step 2: Lay out where you want each of the balls to go around the tray so they are evenly spaced. I chose 5 for each long side and 4 on each of the shorter sides, but this will change if you have different sized trays and balls. Measure the side and divide by number of balls for that side to get a starting distance between them, adjust as needed to make it look balanced to the eye. Once you have finalized the design, mark a tiny x with a pencil in the center of each side where the ball will be. Set the tray on it's side, with the side you are working on up, and start gluing each of the balls down on it's x. Press and hold until secure according to the directions of the wood glue. Finish all the balls on that side and let completely dry before moving on to the other sides. Repeat process on each side. Note: to balance the last two sides on the row of attached balls, you will need to have some stacks of books to keep upright.
Step 3: Outside on a large piece of cardboard or foam board, prime the tray. I used a brush for this but you can buy spray primer in the spray paint section. Let dry. Spray paint the tray. Let dry, and spray paint for a second coat. Let completely dry and cure. Add clear protective bumps for the bottom, if desired, and enjoy!
I love how easy it was to make and I can't wait to make more as gifts and in various colors for different seasons. This would be a great addition to any bar cart!
